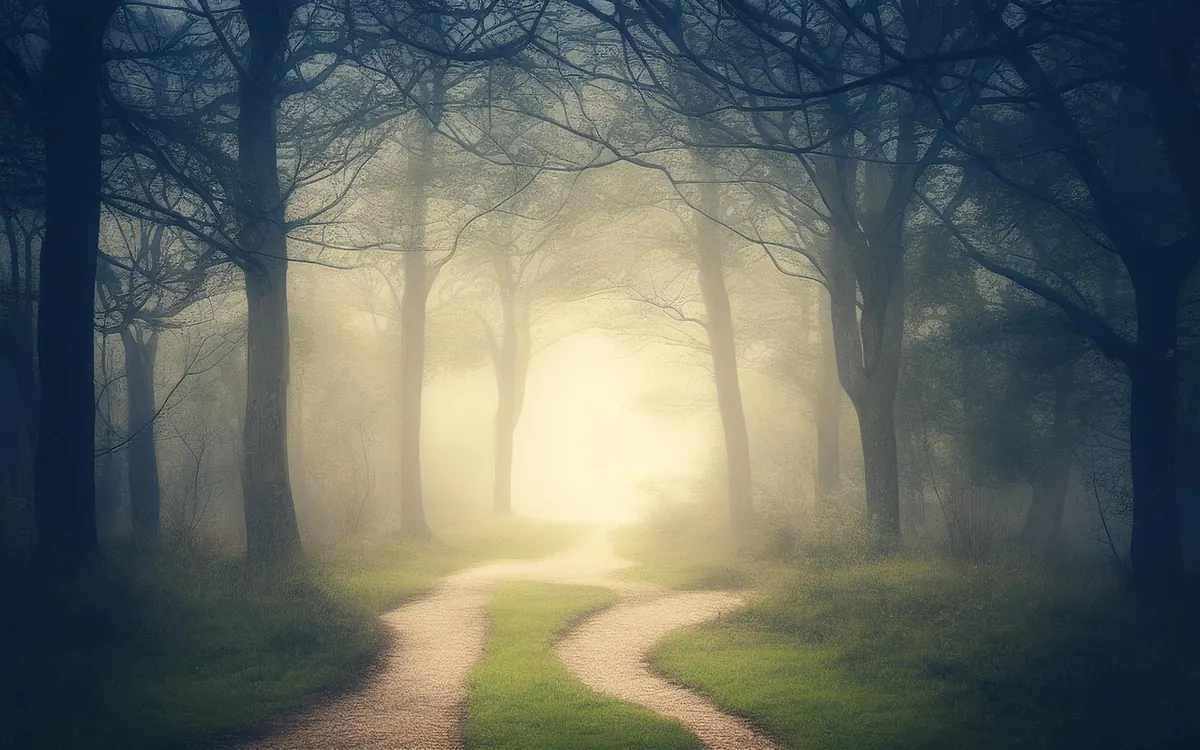
Fog is the closest thing to free lighting a woodland photographer gets. It softens every twig and branch, hides the tangle of undergrowth, and turns an ordinary stand of beeches into something with depth and quiet drama. It also arrives on its own schedule, usually around dawn, and often burns off within an hour of the sun clearing the ridge. The skill isn't expensive gear. It's knowing when to be there, how to meter a bright grey scene, and where to stand once you've arrived.
What Fog Actually Does to a Photograph
Fog is airborne water vapour scattering light in every direction. Practically, that means contrast drops, colours desaturate, and anything in the distance fades toward pale grey. Photographers call that last part aerial perspective, and it's the reason fog works so well in woods: it separates trunks into distinct planes, foreground to background, the way a painter would stack them.
It also edits for you. Dead bracken, litter, a fallen fence, the branch that ruined last week's shot — all of it disappears into the haze. What's left is shape.
The catch is flatness. A foggy frame with nothing dark in it looks like a grey rectangle. You need contrast somewhere: a silhouetted trunk, a black gate, a path curving out of sight. Find the dark and let the fog do the rest.
Camera Settings for Fog: A Starting Point
Any camera works here, including a phone. Fog is a lighting condition, not a technical challenge, and the exposure maths is the same on a mirrorless body as it is on a hand-me-down DSLR.
- Aperture: f/8 to f/11 is the sweet spot for woodland — enough depth of field to hold several layers, without the softness that creeps in at f/16 and beyond.
- ISO: as low as you can reasonably go, usually 100–400. Fog scenes are often still, so you can afford slower shutter speeds.
- Shutter speed: fast enough to freeze leaves if there's a breeze — 1/125 sec is a safe start. In dead air, 1/30 sec or slower is fine, and a tripod helps.
- Exposure compensation: +0.3 to +1 stop. This matters more than anything else on the list.
- File format: raw, always, so you can pull tone back later.
That exposure compensation point deserves explanation. Your camera's meter assumes the world averages out to a mid grey, and it will dutifully darken a bright bank of fog to hit that target. The result is fog that looks like dirty dishwater. Add a third of a stop, check the histogram, and add more until the brightest mist sits near the right edge without clipping. Those highlights should stay bright; they are the point of the picture.
Focus and White Balance
Autofocus struggles in low contrast, so it may hunt or lock onto nothing. Aim the focus point at the nearest strong subject — a trunk, a gatepost — or switch to manual focus with live view magnification. Don't autofocus on the fog itself.
Leave white balance on auto if you shoot raw. Fog usually reads cool and slightly blue, which suits woodland beautifully, so resist the urge to warm it up in camera. If you're shooting JPEG, set daylight and check the result on the back of the screen.
Timing: When and Where Fog Shows Up
Radiation fog — the kind that pools in valleys and sits between trees — forms on clear, calm nights when the ground loses heat quickly and the air above it cools to its dew point. Two conditions do most of the work: a clear sky and very little wind. If the forecast shows overnight temperatures within a degree or two of the dew point, plan to be out.
Damp ground helps. Fog is common after evening rain when the air is already saturated and the sky clears behind it, and it lingers over rivers, lakes, marshes and low fields. Woodland on a slope or beside water is ideal, because cold air drains downhill and collects in hollows.
Arrive 30 to 45 minutes before sunrise. The light before the sun appears is soft and blue; the half hour after it rises is often the best of all, when low sun rakes through the trunks and turns the mist into visible beams. Then it goes. On a bright morning the fog can thin from glorious to gone in twenty minutes, so shoot first and drink coffee later.
Composition: Simplify, Layer, Anchor
Fog rewards a quieter approach than a clear day does. Everything you'd normally use to fill the frame — texture, colour, detail — is muted, so shape and placement carry the photograph.
Build the frame in layers
Look for trunks receding into the mist. A wide lens stretches those layers apart; a telephoto compresses them into a stack of soft verticals. Both work, and they look completely different, so try each before you move on. Get low for a foreground of leaf litter or moss, or find a slight rise so you're shooting across the tops of the mist rather than into it.
Give the eye somewhere to land
One strong element is usually enough: a lone oak, a winding path, a stile, a shaft of light between two beeches. Frame it with plenty of empty grey around it. Negative space is the whole appeal here — a small dark subject in a large soft field reads as deliberate and calm, while a busy frame just reads as muddy.
Shoot toward the light
Turn and face the sun when it's low and diffused by mist. Beams appear, edges glow, and the fog behind your subject lights up. Shield the front element with your hand or a lens hood to control flare, and check the screen for haze across the frame.
Kit, Condensation and Comfort
You need less than you think: a camera, one lens, a cloth, and something waterproof to kneel on. A tripod is useful in still, dim conditions but not essential. What is essential is managing moisture. Moving a cold camera into warm, damp air fogs the lens from the inside out, and you can't wipe that away.
Leave the camera in your bag for ten or fifteen minutes when you arrive so it can adjust to the temperature, and keep a microfibre cloth in a pocket rather than a damp rucksack. Spare batteries live in an inside pocket, since cold drains them faster. If you're walking lanes or parking areas before dawn, wear something visible and carry a small torch; visibility for drivers is genuinely poor in fog.
Five Mistakes That Ruin Foggy Shots
- Packing up as soon as the sun appears. The best ten minutes are usually just after it clears the horizon.
- Leaving the exposure at the meter's suggestion, which produces dull grey images.
- Only shooting wide. A long lens on the same scene often gives the stronger picture.
- Over-processing: heavy clarity, crushed shadows and grey highlights make fog look like noise.
- Wiping the lens with a sleeve. It smears, and you'll see it in every frame.
A Simple Plan for Your Next Foggy Morning
Check the dew point and wind forecast the night before. Charge a battery, pack a cloth, and set an alarm that puts you on site half an hour before sunrise. Walk to somewhere low with trees, water nearby if you can manage it, and start with one subject and one lens rather than chasing every possibility. Shoot into the light, then across it, then away from it. Meter to keep the fog bright, hold the highlights, and stay put for ninety minutes even when it looks like the mist is thinning — that's usually the moment it turns gold. Then go home, open the raw file, and add nothing but a gentle contrast curve.
Photo: jplenio / Pixabay